See it in Action
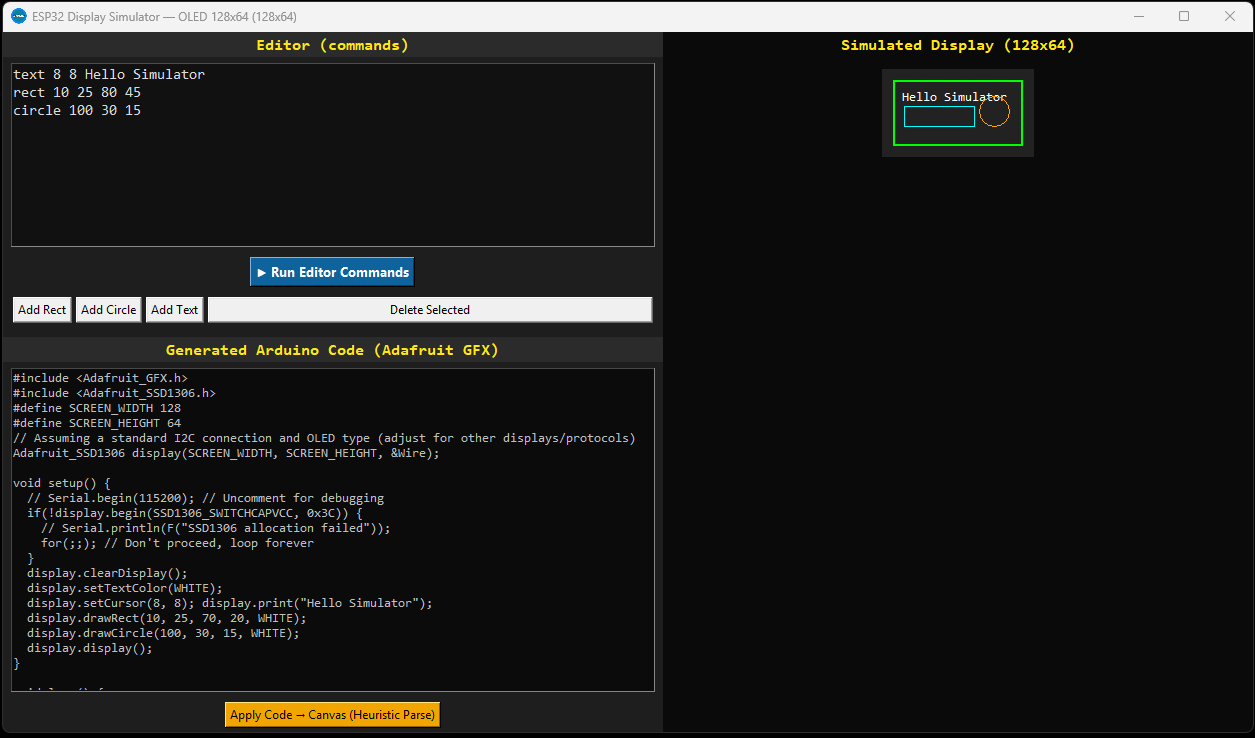
An example of designing a layout and generated code.
The ESP32 Display Simulator is a powerful desktop tool to design custom screens for your ESP32, Arduino, or other microcontrollers with graphic displays. Get instant Adafruit GFX compatible C++ code as you design!
↓ *SIMULATE NOW* (Windows .exe) View on GitHubDeveloping user interfaces for small monochrome or color displays on microcontrollers can be tedious. You typically have to guess pixel coordinates, compile, upload, and then tweak values in a loop. The ESP32 Display Simulator streamlines this process by providing a live, interactive canvas.
You can drag, drop, and resize elements just like in a graphic editor. In real-time, the application generates the exact Adafruit GFX compatible C++ code you need, ready to be pasted into your Arduino IDE or PlatformIO project.
Visually place and manipulate rectangles, circles, and text elements directly on a simulated display canvas. See your design come to life instantly.
As you design, the application automatically generates Adafruit GFX compatible C++ code for your display, including display.setCursor(), display.print(), display.drawRect(), and display.drawCircle().
Choose from common display presets like OLED 128x64 or define custom width and height to match your specific hardware.
Move elements precisely by dragging them. Select an element and press the 'Delete' key to remove it from the canvas and the generated code.
Use arrow keys to visually suggest rotation for shapes. While Adafruit GFX doesn't directly support rotated primitives, the simulator provides a visual cue and notes it in the generated code.
Copy the generated C++ code directly into your Arduino sketch's setup() function, saving countless hours of trial and error.
An example of designing a layout and generated code.
Here's a snippet of what the simulator generates:
#include <Adafruit_GFX.h>
#include <Adafruit_SSD1306.h>
#define SCREEN_WIDTH 128
#define SCREEN_HEIGHT 64

Adafruit_SSD1306 display(SCREEN_WIDTH, SCREEN_HEIGHT, &Wire);

void setup() {
  display.clearDisplay();
  display.setTextColor(WHITE);
  display.setCursor(8, 8); display.print("Hello Simulator");
  display.drawRect(10, 25, 70, 40, WHITE);
  display.drawCircle(100, 30, 15, WHITE);
  display.display();
}

void loop() {
  // Your main loop code here
}
(Note: Actual generated code depends on your design.)
This project is open-source and we welcome contributions from the community! Whether you want to report a bug, suggest a new feature, or contribute code, your help is invaluable.
Download the standalone Windows executable now and bring your display projects to life faster!
↓ GET THE SIMULATOR NOW!
Compatible with Windows 10/11 (64-bit).
Latest version: v1.0.0.